ITG022

AI and the Human in the Loop: What Actually Gets Replaced | IT Guy Show Ep. 022

Episode 22 of The IT Guy Show is a milestone for me, and not just because the number is round. Karl Abbott was my very first guest back on episode one, and he came back for what turned into one of the best conversations I have had on the show.

https://youtu.be/bvhfBVEGjho

Karl is a product manager at Microsoft working on Linux vendor partnerships, a university regent, and the host of his own podcast on the human side of product management. He wrote a LinkedIn post called “AI Didn’t Replace My Work” that caught my attention and kicked off this whole episode. The short version of his argument: AI removes the mechanical friction, but it does not carry the consequence. Judgment, taste, and responsibility stay human. When the execution gets cheap, the quality of your thinking becomes the actual work.

We got into vibe coding, what it actually demands from engineers versus what people assume it removes, and why bad assumptions fed into an AI system come out looking clean and confident on the other side. We also talked about higher education, where Karl made a point that stuck with me: if students are not building judgment through struggle and repetition, schools need to be very intentional about where that formation is going to come from. I shared some of my own experience teaching Linux administration at JCCC and why I tell my students that using AI to fill out a lab is cheating themselves, not just the system.

There is also a good stretch near the end on book recommendations, including a few I had not heard of that I am now actively tracking down.

Watch the full episode on The IT Guy Show: A Human in the Middle | Episode 022

This one fits squarely in the middle of what I think about most: how people who work in technical fields stay sharp and relevant as the tools keep changing underneath them.

FP054

Bootc in Production: What It Actually Looks Like | Fedora Podcast Ep. 054

Episode 54 of the Fedora Podcast is out, and this one digs into something I am genuinely curious about for my own homelab: what does bootc look like when someone is actually running it day to day, not just kicking the tires?

https://youtu.be/6_ZzEIvNySc

James Harmison joined me to walk through how he uses bootc across a pretty wild range of contexts, from his personal laptops and a stripped-down SteamOS-style couch gaming rig, to swapping kernels in OpenShift for AMD GPU support at work. His setup replaces the traditional dotfiles repo entirely, bakes kernel modules directly into the image so DKMS and akmod are completely gone, and runs CI on his homelab to rebuild the image on every commit. It is the kind of thing that sounds overcomplicated until he explains it, and then it sounds like the only sane way to manage a system.

We also spent time on Chunkah, an upstream project working on smarter container image chunking for bootc. James was one of the first people to stress test it on a large image and found some real problems with the packing algorithm. He helped kick off the conversations that are now shaping the next release. That is the kind of quiet upstream contribution that does not always get attention but genuinely moves the project forward.

If you are curious about bootc and want to hear from someone who has been living in it for a couple of years, this episode is a solid starting point.

Listen to the full episode on the Fedora Podcast: Bootc in the Wild | Episode 054

This is the kind of conversation that fits right in the middle of my broader interest in where Linux infrastructure is heading, both for homelabs and production environments.

Introduction to Flock | Fedora Podcast 053

Flock to Fedora 2026: What to Expect in Prague

Flock to Fedora 2026 is heading back to Prague this June, and on episode 53 of the Fedora Podcast, Noah and I sat down with Justin Wheeler and Emma from the Fedora design team to talk through everything contributors and community members need to know.

For anyone who hasn’t been, Flock is the Fedora Project’s annual contributor conference — not a sales event, not a product launch, just the place where a global community of mostly volunteers gets together once a year to do real work, set direction, and remind themselves why they got into open source in the first place. Justin, who serves as Fedora Community Architect at Red Hat, described it well: it’s where you go to fuel up on the energy that carries you through the rest of the year. That tracks with my own experience. Some of the best conversations in open source happen at a table at midnight over bad food and good drinks.

The decision to return to Prague for a second consecutive year was a deliberate one. Travel anxiety into the US is real for a significant portion of the global Fedora community right now, and the Prague venue worked exceptionally well last year — accessible by train and plane, flexible space, and existing relationships with the hotel. Justin was transparent that this isn’t a new permanent model, just a practical call that let the team focus on improving the conference itself rather than rebuilding logistics from scratch in a new city.

The design theme for Flock 2026 is Alchemy, and Emma walked us through the research behind it. Prague’s history with alchemy traces back to Emperor Rudolph II, who brought Europe’s top alchemists to the city during his reign in the 1500s in pursuit of the philosopher’s stone. The design team ran a community vote on potential themes and alchemy won, which gave them a rich visual direction — medieval manuscripts, heraldic imagery, the Fedora four foundations rendered as elemental colors radiating from a stone. Fedora’s Flock mascot Kulora returns dressed as an alchemist this year, searching not for the philosopher’s stone but for Fedora itself. Emma is also reworking the design process to build a shared asset library so newer contributors can pick up design tickets without starting from a blank canvas.

As for the schedule: the conference runs June 14th through 16th, Sunday through Tuesday. Sunday is “Day Zero” — an offline workshop day with no AV and no plenary sessions, just hands-on working time for teams and SIGs to actually get things done face to face. Day One and Day Two follow a mirror structure: one opens with a single plenary track then breaks into three simultaneous recorded breakouts after lunch, the other does it in reverse. Both days will be live streamed so remote attendees can follow along. Registration is free, but you need to sign up in advance to get food, swag, and a conference t-shirt — and based on what Emma described about the alchemy branding, you’re going to want the t-shirt. Financial aid is also available for those who need it.

You can register now at fedoraproject.org/flock2026 and hang out in the #flock:fedoraproject.org room on Matrix if you have questions. Hope to see some of you in Prague.

Deploy RLC Pro on Azure

Deploy RLC Pro on Microsoft Azure Marketplace

I wrote this deployment guide for CIQ covering how to get RLC Pro running on Microsoft Azure, from the Marketplace listing to a production-ready Enterprise Linux environment.

The post opens with a question worth asking: how much time does your team spend configuring Enterprise Linux after launch? LTS repos, FIPS packages, support credentials. None of that is the work you spun up the instance to do. RLC Pro on Azure addresses that directly. The image ships pre-configured with CIQ repository access, and enabling Long-Term Support or FIPS 140-3 validated packages is one step after connecting your subscription.

I covered what each enterprise capability actually means in practice: LTS minor version pinning for teams that cannot rebuild and revalidate every time upstream ships a new release, FIPS 140-3 for regulated workloads in government, defense, healthcare, and financial services, and full Enterprise Linux binary compatibility for teams migrating existing automation and applications.

Read the full post on CIQ: How to Deploy RLC Pro on Microsoft Azure

This is the third post in a series I produced at CIQ on deploying RLC Pro across major cloud providers, with AWS and Google Cloud covered in companion guides.

How to maximize the throughput of your AI infra

From Fresh Install to AI Inference in Under 4 Minutes

Getting a GPU box ready for AI workloads is way harder than it should be, and we proved that live on the CIQ Webinar Series on April 2nd.

I brought in Brian Dawson from CIQ product management, Damon Knight (CIQ’s resident AI nerd and automation engineer), and Zach from AI Insight Solutions for an honest conversation about where most organizations actually are when it comes to GPU infrastructure. The short answer: a lot of people started on cloud, found it expensive, bought hardware, and are now figuring out that running AI on prem is a whole different problem.

The demo said everything. We ran a fresh Ubuntu setup through the full stack, including Nvidia drivers, CUDA, the CUDA toolkit, cuDNN libraries, and PyTorch, with Damon copy-pasting commands he spent months refining. Time to first inference: around 13 and a half minutes, and roughly 10 of those were just prerequisites. Compare that to RLC Pro AI, which ships with the validated stack already baked in. Same hardware, same demo code, first tokens in about 3 minutes and 30 seconds.

What makes that difference real at scale is validation. It is not just that the stack installs faster. It is that CIQ actually tested the dependency combinations, recompiled PyTorch with the right flags, and confirmed the GPU is doing the work instead of silently falling back to CPU. Damon’s point about checking Nvidia SMI and seeing 0% GPU utilization hit close to home for anyone who has been there.

If you are building or managing AI infrastructure, this one is worth watching.

Subscribe to The IT Guy Show on YouTube and follow along at itguyeric.com for more Linux, open source, and infrastructure content.

CIQ Portal

CIQ Portal Is Live: Access and Deploy CIQ Products on Your Own Terms

I wrote the launch post announcing the CIQ portal going live at portal.ciq.com, covering what it is, who it’s for, and how to go from registration to your first download in under a minute.

The portal is the central hub for everything CIQ: product downloads, license keys, documentation, and team permission management across the full portfolio. That includes RLC Pro, RLC Pro Hardened, RLC Pro AI, RLC+, CIQ Bridge, Fuzzball, Ascender Pro, and Warewulf Pro. The post walks through the catalog structure, the Solution Stacks view for teams who aren’t sure where to start, and a step-by-step example deploying RLC Pro AI for a sovereign AI workload in a private data center.

One thing I wanted to get across was how genuinely fast the self-service flow is. Free tier, 30-day trial, or full enterprise deployment, you can get moving without talking to anyone first.

Read the full post on CIQ: The CIQ Portal Is Live

Product accessibility is something I care about, and this post was a good opportunity to show how a well-designed portal can lower the barrier to evaluating enterprise infrastructure software.

Migrate to RLC Pro

How to Migrate from RHEL to RLC Pro Without Re-Architecting

I wrote this guide for CIQ covering how to convert a running RHEL system to RLC Pro, without rebuilding servers or re-certifying your application stack.

The core of the post is Enterprise Linux binary compatibility. Because Rocky Linux builds from the same source RPMs as RHEL, the kernel ABI stays stable, shared libraries match, and your applications, Ansible playbooks, and automation carry over without modification. What actually changes is repository URLs, package signatures, and OS branding. That’s it. The migrate2rlc script handles the conversion on a live system, and the post walks through the full process: environment assessment, collecting CIQ portal credentials, running the migration, and validating the result.

I also covered what you get on the other side. LTS version pinning, FIPS 140-3 validated packages on the .2/.6/.10 releases, commercial support tiers, and IP indemnification. The migration is the starting point, not the finish line.

Read the full post on CIQ: How to Migrate from RHEL to RLC Pro Without Re-Architecting

Migration content sits at the intersection of technical depth and business case, which is the kind of writing I enjoy most and where my sysadmin background actually earns its keep.

What Enterprise Linux Should Actually Be

What Enterprise Linux Support Actually Means (And Why It Matters)

Rocky Linux is everywhere, and for good reason. But community is not always enough, and this webinar is where Brady Dibble and I got into exactly what changes when you need a vendor behind your Linux stack.

Brady is CIQ’s director of product management and honestly one of the clearest thinkers I have talked to on the topic of enterprise Linux. We started at the 40,000 foot view: enterprises are not planning infrastructure in years, they are planning in decades. And that long-term stability calculus gets complicated fast when AI is forcing you to chase the latest kernel features and GPU support at the same time.

A big chunk of our conversation was about the difference between RLC Plus and RLC Pro, and when each one makes sense. RLC Plus is free, vendor-validated, and great for homelabs, startups, and anyone who needs more than community but is not running regulated production workloads. RLC Pro is where you get LTS, FIPS 140-3 compliant modules, indemnification, and actual support when things go sideways. Brady also made a point that stuck with me: you do not have to choose upfront. You can start on RLC Plus and move a node to Pro with basically a single command.

We also got into what indemnification actually means in practice, how FIPS compliance differs from FIPS certification, and why CIQ intentionally separated itself from the Rocky Linux project governance. That last one surprises a lot of people, and it came up at SCaLE just before we recorded this.

If you are running Linux in production or evaluating your options, this one is worth the watch. Subscribe to The IT Guy Show on YouTube and follow along at itguyeric.com for more.

Active Linux Security with RLC Hardened and LKRG

Proactive Linux Security: How RLC Hardened Goes Beyond Patching

Reactive security is table stakes at this point, and it is not keeping up. I sat down with Nathan Blackham, Brady Dibble, and Sultan Alof from CIQ to talk about what it actually looks like to build defense into the operating system from day one.

The conversation started with something that hits close to home for anyone managing Linux at scale: CVE volume has exploded. The Linux kernel became its own CVE numbering authority a few years back, which means every commit gets evaluated for security relevance. That is good in theory, but in practice it means patching has become a near full-time job, and mission usually wins when you have to choose between a reboot window and keeping production up. Brady put it plainly: compliant and secure are not the same thing, and the gap between them is where things go wrong.

That is the whole premise behind RLC Hardened. It ships with a set of code-level changes designed to close off entire attack vectors before a CVE even exists for them. That includes a hardened glibc build, hardened malloc, tightened OpenSSH that drops the XZ library linkage after startup, stronger password hashing via yescrypt, and a few other targeted modifications. The gold image comes out at 95% STIG compliance on day one, which is an actual measured number, not marketing copy.

The standout piece is LKRG, the Linux Kernel Runtime Guard. Sultan walked through how it works and it is genuinely different from anything else in this space. Rather than scanning for known exploit signatures, it watches for the end goal of an exploit, things like a process claiming root credentials it never earned through legitimate channels. The demo showed it killing an exploit attempt cold, and the performance overhead is around 2.5%, which is low enough that most workloads will not notice it. It also ships signed for secure boot, which matters a lot in regulated environments.

If you are running Linux in production and security compliance is part of your world, this one is worth your time. Subscribe to The IT Guy Show on YouTube and follow along at itguyeric.com for more.

Running an AI Locally | Live Ops 005

Run AI Locally on Fedora with Ollama: Live Ops 005

I wanted to run AI locally on Fedora using an Nvidia GPU I had sitting in my Dell PowerEdge R730 — and an hour and a half later, I actually got it working. Here’s what the road looked like.

The hardware is a Tesla K80, which is basically two 12GB VRAM cards in one chassis and cost me next to nothing off Amazon. The plan was straightforward: get the Nvidia drivers working on Fedora Server 41, pull down Ollama in a Podman container, add Open WebUI on top for a ChatGPT-like interface, and wire it all up behind NGINX Proxy Manager. I had notes. I had a cheat sheet. I was ready.

What I wasn’t ready for was Fedora’s relationship with Nvidia drivers. The Tesla K80 needs the 470.xx legacy driver, not the current one, and figuring that out took most of the first hour. Between installing the wrong driver version, conflicts with packages left over from previous attempts, and the driver service not loading cleanly, it took a force rebuild of akmods and dracut before nvidia-smi finally came back with output. AMD cards just work. Nvidia is a project.

Once the GPU was cooperating, getting Ollama running locally turned out to be easier than the container approach I’d planned, since the GCR image path for the Podman version kept returning errors. Ollama installed directly on the host, Llama 3.2 pulled down without complaint, and I had a working local model to talk to inside of a few minutes. DeepSeek R1 8B came along for the ride as a second model to compare. Open WebUI came up in a Podman container, and after a solid round of “why won’t this connect,” the fix turned out to be a single :Z flag on the volume mount — SELinux doing what SELinux does.

By the end of the stream, Open WebUI was running, both models were loaded, and I had a local AI setup I could actually use. The NGINX reverse proxy was still showing a bad gateway when I had to call it for the day, but that’s a problem for next session. On the to-do list: get RAG working so I can feed it my own blog posts as a local knowledge base, and eventually stop paying OpenAI for what I can run at home.

Watch the full stream above, and if you want to follow along as the homelab build continues, subscribe to the channel or grab the audio version of the main show at podcast.itguyeric.com.

Building a Golden Image | Live Ops 004

Building a Golden Image | Live Ops 003

The goal was simple: build a reusable Fedora golden image homelab template I can clone whenever I need a new server. Nothing about it was simple.

The plan was to use Image Builder inside Cockpit to create a base Fedora server image, then store the resulting QCOW2 file on my unRAID box so I can spin up new VMs on demand. I had packages already lined up in the blueprint: Crony, Cockpit, NetworkManager, bash completion, VIM enhanced, TuneD, and a few others. The Ansible service account was configured, IPv6 disabled at the kernel level, and automatic partitioning set so I’m not hand-holding every deployment. It was supposed to be a quick stream before the Fedora podcast.

What actually happened was a solid hour of fighting permissions issues with the welder group, a blueprint package that didn’t exist in Fedora the way it does in RHEL, and Image Builder refusing to build ISO images while happily producing QCOW2 files without complaint. Once I got the QCOW2 built and pulled down, I had to convert it to an IMG file using qemu-img convert just to get unRAID to accept it, then resize the image to 32 gigs because the VM came up with a 4.2 gig root partition and nowhere to grow. ext4 on an unRAID VM turned out to be less cooperative than I’d hoped.

The good news: by the end of the stream I had a booting Fedora VM with bash completion, VIM enhanced, and Cockpit already running, SSH keys in place, and the performance profile defaulted to virtual-guest automatically. The less good news: I’m probably moving VM deployment over to my Fedora-based ITG02 hypervisor from Live Ops 003, where QCOW2 management is a lot less painful. The Ansible playbook to automate the whole build-convert-deploy pipeline is the next piece, and that’s where things should start getting cleaner.

Watch the full stream above, and if you want to follow along as the homelab build continues, subscribe to the channel or grab the audio version of the main show at podcast.itguyeric.com.

RHEL as a Hypervisor | Live Ops 003

RHEL Hypervisor Homelab Setup: Live Ops 003

A Dell PowerEdge R730 that’s been sitting in the rack collecting dust finally has a job: and this stream is the whole messy process of giving it one.

The goal was straightforward: install RHEL 8 on bare metal and get the R730 running as a RHEL hypervisor homelab host. But rather than just grabbing a stock ISO, I went straight to Red Hat Image Builder on console.redhat.com, because if you spent years doing TPMM work for RHEL, you use Image Builder. The hosted build queue had other ideas though, and what should have taken a few minutes turned into a 40-minute wait that only resolved after I kicked off a second build to shame the first one into finishing.

Once the ISO was finally in hand, getting the Dell to actually boot from it proved to be its own adventure. Wrong boot order, a RAM upgrade the server needed a moment to accept, and the classic “it wasn’t broken, just needed more time to transfer over the network” diagnosis courtesy of guest heckler Nate, the Iron Sysadmin. The install itself went smoothly once RHEL 8.10 got its turn: custom partitioning, a dedicated Ansible service account, kdump disabled, and TuneD set to virtual-host profile so the system optimizes for running VMs rather than general workloads.

After the install, I wired the box into Red Hat Insights, which is included with any RHEL subscription and immediately flagged a handful of advisories, two of which were auto-remediable via an Ansible playbook without ever leaving the Insights UI. Cockpit got enabled, the virtualization host package group went in, and I spun up a test VM to confirm everything was working. I wrapped the stream with a local Image Builder instance installed on the hypervisor itself, laying the groundwork for generating golden VM templates for Fedora, CentOS Stream, and RHEL without depending on the hosted service.

Watch the full stream above, and if you want to follow along as the homelab build continues, subscribe to the channel or grab the audio version of the main show at podcast.itguyeric.com.

WordPress Migration | Live Ops 002

WordPress Migration to Homelab: Live Ops 002

The WordPress migration homelab project that started as a quick detour turned into a two-hour deep dive — because nothing in the homelab ever goes exactly to plan.

If you caught Live Ops 001, you know we got the Matrix server almost running — right up until an SSL certificate issue stopped us cold. The problem? itguyeric.com was hosted on Namecheap’s EasyWP platform, which doesn’t let you export your own certificates. The fix was obvious: move the site home. And with a $94 renewal coming up in about a week, there was really no reason not to.

The plan was to spin up a fresh Fedora server VM, deploy WordPress in a Podman container, migrate the site using the All-in-One WP Migration plugin, and wire it all up behind NGINX Proxy Manager with a Let’s Encrypt cert that covers both itguyeric.com and matrix.itguyeric.com. Clean, tidy, two birds one stone. In practice: wrong ISO architecture, a MariaDB port conflict, a file permissions hang, and a Matrix federation API that kept failing despite the federation tester saying everything was fine. Classic.

By the end of the stream, WordPress was running locally and the Matrix server was showing green check marks on the self-check — but federation between accounts still wasn’t cooperating. Eric called it to go take care of family, with a promise to sort out the remaining certificate and domain config issues in a follow-up.

The WordPress migration homelab journey continues — subscribe so you don’t miss Live Ops 003 when it drops. Audio version of the main show is always at podcast.itguyeric.com.

Matrix Server Rebuild | Live Ops 001

Self-Hosted Matrix Server Rebuild: Live Ops 001

I fired up a livestream to do something I’ve been putting off way too long: bringing my self-hosted Matrix server back from the dead, live, in real time, with no safety net.

The stream started simple enough — spin up a fresh VM, throw CentOS 7 on it to match the original environment (don’t @ me), and use the Matrix Docker Ansible Deploy project to get everything running again. The goal was straightforward: restore the old setup, get the Matrix bridges reconnected to Discord and Slack, and then figure out how to modernize the whole thing on something like Fedora or even OpenShift down the road.

What actually happened was a four-plus-hour deep dive into DNS records, SSL certificate headaches, and Namecheap doing Namecheap things. By the end, federation checks were almost passing — but a CNAME where an A record needed to be, and a certificate tied to a shared hosting account I couldn’t extract cleanly, kept the finish line just out of reach. Classic homelab energy.

The good news: the Matrix server itself was provisioned, configured, and responding. The bad news: itguyeric.com’s WordPress site is hosted via Namecheap EasyWP, which doesn’t let you pull your own certs — so the next logical step is migrating the WordPress site home and tackling the SSL setup properly.

If you’re running your own Matrix homeserver or thinking about it, this stream is a pretty honest look at what that process actually involves — including the parts that go sideways. No polished edits, no second takes.

Watch the full stream above, and if you want to follow along in real time next time, join the IT Guy Show room on Matrix or hop into the Discord. You can also subscribe to the audio version of the main show at podcast.itguyeric.com.

As a long-time SysAdmin, one of the core tasks I’ve always had to tackle is managing users and groups on Linux systems. Whether you’re running a personal server or managing an entire fleet of Linux boxes, understanding how to efficiently handle user and group permissions is essential for maintaining a secure and organized system. In this post, we’ll dive into the nuts and bolts of user and group management on Linux, walking through practical examples and providing some handy commands to keep in your toolbox!

Why User and Group Management Matters

Before we jump into the command line, let’s talk about why user and group management is so crucial. Linux is a multi-user operating system, meaning that it allows multiple users to work on the same machine simultaneously. Each user has their own unique environment, including their files, processes, and settings. Proper management of users and groups ensures that everyone has the right access to the resources they need while keeping sensitive data protected.

Adding Users: The Basics

Let’s start with the basics—adding a new user. In Fedora Linux, which I am using as my distribution, the command to add a user is useradd. Here’s a simple example:

sudo useradd eric

This command adds a new user named “eric” to the system. However, this is just the beginning. By default, useradd creates a user with a locked password and no home directory. To make the user account functional, you’ll want to add a few more options.

Creating a Home Directory and Setting a Password

To create a home directory for the user and set a password, you can use the -m option to create the home directory and passwd to set the password:

sudo useradd -m eric
sudo passwd eric

The -m option ensures that a home directory (/home/eric) is created automatically. The passwd command then prompts you to set a password for the new user, which is crucial for allowing them to log in.

Assigning a User to a Group

In Linux, groups are used to manage permissions for multiple users at once. Each user can belong to one or more groups. By default, when you create a user, they are assigned a private group with the same name as their username. However, you can also add them to additional groups as needed.

To add the user “eric” to a specific group, say “developers,” you can use the usermod command:

sudo usermod -aG developers eric

The -aG options append the user to the group without removing them from any other groups they might already belong to. This is important—forgetting the -a option will remove the user from all other groups, which could cause unintended access issues.

Creating and Managing Groups

Creating a new group is straightforward with the groupadd command. Let’s say you want to create a group called “admins”:

sudo groupadd admins

Once the group is created, you can add users to it using the usermod command, as we discussed earlier. You can also assign group ownership of files and directories, which is useful for collaborative environments. For example, to change the group ownership of a directory:

sudo chgrp admins /opt/project

The chgrp command changes the group ownership to “admins” for the /opt/project directory.

User and Group Management Best Practices

Managing users and groups efficiently isn’t just about knowing the right commands—it’s about understanding best practices to keep your system secure and organized. Here are a few tips to keep in mind:

  1. Use Groups for Permissions: Instead of assigning permissions directly to individual users, assign them to groups. This makes it easier to manage access as your user base grows.
  2. Limit Root Access: Only grant administrative privileges to users who absolutely need it. For others, use the sudo command to allow them temporary access to elevated privileges when necessary.
  3. Regularly Review Group Membership: Periodically check which users belong to which groups. Over time, users might change roles, and their access needs will change too. Keeping group memberships up-to-date helps prevent unnecessary access.
  4. Use Strong Password Policies: Ensure that all users have strong, unique passwords. You can enforce password complexity and expiration policies using tools like chage and pam_pwquality.

Wrapping Up

Managing users and groups on Fedora Linux—or any Linux distribution—is a foundational skill for any SysAdmin. By understanding and applying the commands and best practices we’ve covered in this post, you’ll be well on your way to maintaining a secure and efficient Linux environment.

If you found this guide helpful, be sure to check out more content on The IT Guy Blog and tune in to my podcast, where I dive deeper into topics just like this one. Whether you’re just getting started with Linux or you’re looking to refine your skills, there’s always something new to learn.

Happy SysAdmin-ing!

The Apple Vision Pro stands to be one of the next innovations that changes how we use technology. Is it there yet? Not quite, but read on to see what I discovered. 

I’ve been in IT since before it was my chosen career path. When I first started out in my career, I was just an enthusiast. I enjoyed getting the latest gadgets, learning about them, and playing with them. I remember being a senior in high school and buying a Palm Pilot. I may have even played Hearts during our science class.

A lot of days, it’s a slog. If you are a SysAdmin, like I was, it takes many days to work to keep the lights on. You try to learn and grow your toolbox, but most days, it’s resetting that same user’s password for the third time this month.

Now and then, you have those days where you sit back and go, “This could be something!” I did that today. I’m in the grind of getting video and presentation content ready for the following Red Hat Enterprise Linux release ready to go out the door, as well as our upcoming Red Hat Summit conference. I needed a break.

I’ve heard people talking about Apple’s first steps into the VR world, and I wanted to see them for myself. While I bleed Linux, I am an undying Apple Fanboy. I have most of their tech somewhere in my house. So, why not!?

You can reserve a slot online for an in-person, 30-minute guided demonstration of how to fit, calibrate, and use the device. Wear prescription glasses? No problem; they can scan your lenses and fit your unit with inserts to match.

I have only played with Meta Quest 2 for a couple of days, so I had little more experience to go on for my demo. I initially thought it was a sleek-looking headset, but how heavy would this be?

Once you put on the device, you adjust a knob on the side of the headband. You can tighten it to wear it; it’s solid yet comfortable. My initial fear was that it would be too heavy, not so! Yes, it has some weight, but it took a little time to get used to it.

For my demo, I wanted the full experience. I wanted to be guided through the basics – you can customize your tour, but I wanted to avoid going in with any preconceptions. We started with hand gestures and the home screen.

Apple Watch users will be familiar with the crown that twists and clicks. However, the main interaction isn’t with hand gestures or the crown; it’s with your eyes! Tiny cameras line the inside of the visor and track your eye’s movements. You look at an icon, and it will highlight. Then, all you have to do is pinch two fingers together to select.

We looked at pictures from standard images to iPhone-based panoramas to something new called immersive mode (available now on iPhone 15 Pros and Max Pros). I won’t spoil anything, but it looked like I was in the room!

We moved to playing a pinball game, watching movie trailers, and searching the internet. Moving windows around, resizing, and scrolling was a breeze! I got tripped up a little when it came to typing.

Ultimately, it was an exciting experience. I really enjoyed the digital tour. I can see many use cases for travel and taking my books, studies, and multimedia.

Is it a daily driver? I do online research, work on Linux servers, and interact with an office suite all day. I recommend not. Is it worth the price tag to not be a daily driver? No.

However, that is today. The hardware and interactivity were far beyond my expectations. I count this as a public beta, version 1.0. The Vision Pro has come a very long way since its release. Third-party and iOS mobile apps are getting better support all the time.

So, when it’s released, the Apple Vision Pro 2 will be hard to say no to!

I get asked on a regular basis how I got my start in Linux; over the last couple of days, I put together my most comprehensive list yet and I wanted to share it with all of you!

Where do I start!?

One of the best ways to get comfortable with Linux is to utilize it everywhere you are. The first place I think about is your daily computer driver. I learned so much by working in Linux on a daily basis. Linux-powered laptops are far more prevalent than they were a decade ago. I can recommend a few companies that I know are dedicated to Linux: System76, Lenovo, and Slimbook to name a few. Of course, you can buy a lot of these second hand on eBay or similar.

What distribution do I pick?

(Disclaimer, I work for Red Hat, so I maybe a bit biased.) I talk to Sysadmins regularly who are split between different distribution families. For instance, Ubuntu and Red Hat-based distributions are very different in terms of operation, commands, and…we’ll call them “ idiosyncrasies”. I would recommend if your work uses Red Hat, to focus on learning Red Hat based distros. I, myself, came up in much the same way: I learned Red Hat as a Linux Systems Administrator, so, that’s what I primarily use even at home.

These include:
Red Hat Enterprise Linux (Free Developer Subscription!)
CentOS Stream
Fedora

What advice can you give for someone interested in learning more about Linux distributions? Where should I start?

Linux is one of the most studied topics online. There are countless YouTube videos, blogs, and podcasts. I started learning about Linux and Open Source through a podcasting community called Jupiter Broadcasting. They have Matrix channels, live podcasts, and an amazing community of people to help new members learn and grow. I actually got my start podcasting on Linux Unplugged, one of their shows.

If you want to get your hands dirty, I would also recommend a Linux laptop and get comfortable with virtual machines and cloud providers. You can get a free credit when you sign up for Digital Ocean (FYI, that’s a referral link tied to my account.) You can spin up all sorts of servers, distros, and play with different applications. Their documentation and walkthroughs are next level! I also help support a series of labs for learning on RHEL (Red Hat Enterprise Linux). There are some Admin 101 and Developer 101 labs that are great at teaching the basics of Linux and moving into more complex topics: https://lab.redhat.com. (They are free to use!)

Number one thing I can recommend here is to find a community of people to learn and grow with.

How did you discover that you wanted to focus on System Administration, and do you have any insights for someone interested in this specialization?

Great question. Since I was 5, I had an interest in computers. I learned how to change my Dad’s desktop wallpaper on an old Mac PC and never stopped learning from there. Once I graduated high school and started college at DeVry University, I did the obvious thing: I signed up for a computer science degree. A couple of semesters in, I was taking a C# class and knew I would never survive as a developer. I got so lost with arrays, ha ha! So, I distinctly remember walking by this lab with racks of hardware, cables, and flashing lights. I knew that was where I needed to be. I went to my school advisor and switched my major to Network Communications Management. I started learning Cisco, firewalls, switching, and my favorite – operating systems.

Around the same time, I got a job as an IT Support Intern for a local municipality. I got to do desktop support, help desk, and even some Active Directory management. I loved what I was doing. After college, I got a job doing IT support – desktop and servers. After a couple of years, I was managing all sorts of servers and working on desktop refresh programs – new hardware every few years, desktop imaging and the like. I helped manage a handful of Linux servers that no one else really wanted to touch; I had tinkered with Linux in my college days, and decided I wanted to specialize.

I pursued a new job that would allow me to focus on Linux Systems Administration and started studying for my RHCSA (Red Hat Certified Systems Administrator). Over almost a decade, I was a Linux Systems Administrator, a Linux Systems Engineer, then a Solutions Architect (pre-sales Sysadmin basically), then finally about 2 1/2 years ago moved into Technical Marketing for RHEL where I really hit my stride!


What experiences and skills would be helpful for someone entering this field?

In today’s computer-driven resume world, its important to check as many boxes as you can. Have a “home lab” (like Digital Ocean or a PC at home you use as a “server”). Showing that you are constantly learning is huge. A bachelors degree is a huge plus as well as a technical certification in a field related to what you are interested. You don’t have to have all this up front but every step you take makes it easier to get the next job then the next and so on.

In your opinion, where’s the best place for me to find out about openings within this field?

Now, its been 6+ years since I had to job hunt… However, from what I’ve kept my eye on, LinkedIn is a HUGE place to get started. In fact, LinkedIn Premium is a good way to go. You can use their “AI” to help you write a title and about sections. LinkedIn has job postings, but you can also mark yourself as “open to work” and job recruiters will find you and match you to jobs they have available. (The link above will give you 2 months of Premium for free, after that it gets really expensive but you can cancel at any time.)

There are still other sites like Monster and Dice, but I haven’t had good luck there. Though if you are really eager to start your IT career you can never send out enough resumes!


Do you know of any programs or webinars that you think could be helpful to someone looking to enter the IT Support field?

Oh do I! You can check out the Sudo Show where I am a founder and former host. The Sudo Show is part of the Tux Digital Network, home of Destination Linux among others. There’s Jupiter Broadcasting and the Ask Noah Show. There’s the Fedora Podcast, the CentOS video podcast (new), and the RHEL YouTube channel. Our show Into the Terminal is a great place to start learning.


Do you know of other individuals in the field whom I could contact?

I’d start with posting questions on LinkedIn or Mastodon and using hashtags, like #linux. Get invovled with podcasting communities like the Ask Noah Show or Jupiter Broadcasting. They are on Discord, Mastodon, Telegram, and others!


I hope these questions and answers help you in your journey. I’d love to know what other topics you’d like me to cover or what other questions you may have. My virtual door is always open!

I know a lot of these resources have my name attached to them in some way, but one of the reasons I moved from Systems Administration to Technical Marketing was to build tools and resources I could have used when I was in your place – to learn and grow into a field I was very interested in.

Image courtesy of Max Duzij, Unsplash

Way back in the day, humanity created computers to help make our lives easier. In a lot of ways, they have; in others, it’s made life much more tedious, especially for the SysAdmin. What used to be a mainframe has turned into hundreds of servers, containers, and virtual machines spread across data centers, clouds, and even laptops!

Never fear, Infrastructure as Code (IaC) is here. Tools like Ansible have been around for over a decade or more but in the past few years they have really picked up speed. Ansible is a simple, efficient approach to automating and standardizing our environments while cutting down on the time, increasing reliability, and removing the human error factor from operations and deployments!

My Story

Probably around 2012 or so, I was a rookie Linux Systems Administrator just making the move away from managing Windows servers and desktops. I remember how much fun patch days were…at first. We got to take the morning off, spend an evening at our off-site data center, order in some Jimmy John’s, and once the corporate office closed, start patching systems. We ran CentOS, RHEL, Oracle Enterprise, and maybe even an Ubuntu system or two.

Looking back, it was actually an unnecessary time suck! Why!? Patch a couple of hundred servers, by hand, rebooting systems manually, and hoping that nothing broke because the application and database administrators were already at home enjoying the end of their workday. The one saving grace at that point was Tmux (an amazing tool to manage multiple terminal sessions at once). At least then I didn’t have to type yum update 200 times!

I guess Charles Dickens might have said of my career: “It was the best of times, it was the worst of times…” I finally got to focus on Linux Servers, bye-bye Windows, but who wants to spend their Thursday nights patching a couple of hundred servers by hand?

That’s not why you’re here, though. You all know I have my SysAdmin scars and I wear them with pride because now, I get to share amazing lessons I learned (or in today’s case should have learned back then). Today, I want to introduce a tool that could have taken our patching times from 6-7 hours down to what could have been less than an hour. Even more, that process could have been completely automated!

What is Ansible?

Ansible is a project bred from the idea that all infrastructure (even security, networking, and cloud) should be code. In other words, if you think of your lab, network, enterprise, whatever as a restaurant, Ansible would be the recipes the cooks used to make every dish. Ansible is written predominantly in Python and utilizes YAML or “YAML Ain’t Markup Language” (who doesn’t love a good recursive acronym?) for its playbooks.

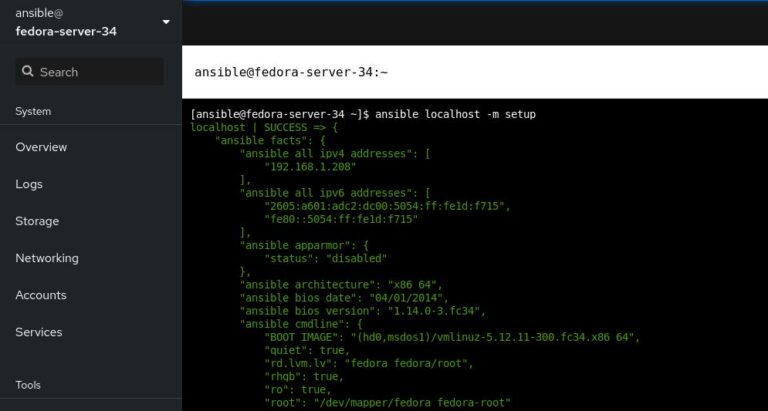
Ansible, not to be confused with the Red Hat product Ansible Automation Platform, is an open-source project that runs across most Linux and Unix systems as well as Mac and Windows and even networking gear, clouds, and security appliances! The list of modules and supported platforms grows with every release.

[ansible@fedora-server-34 ~]$ ansible --version
ansible 2.9.21
  config file = /etc/ansible/ansible.cfg
  configured module search path = ['/home/ansible/.ansible/plugins/modules', '/usr/share/ansible/plugins/modules']
  ansible python module location = /usr/lib/python3.9/site-packages/ansible
  executable location = /usr/bin/ansible
  python version = 3.9.5 (default, May 14 2021, 00:00:00) [GCC 11.1.1 20210428 (Red Hat 11.1.1-1)]
[ansible@fedora-server-34 ~]$ 

The name was inspired by Rocannon’s World, a novel by Ursula K. Le Guin. In the 1966 novel, ansible was a fictional, instantaneous communication system. Ansible would later become the name of the open-source tool. Michael DeHann, the original developer decided to build a company around his new tool and with the help of Said Ziouani and Timothy Gerald founded AnsibleWorks Inc. Later, the company was renamed Ansible Inc and eventually was acquired by Red Hat in 2015.

Why Ansible?

Ansible burst onto the field in an age where Infrastructure As Code (IaC) tools seemed to be everywhere. However, Ansible had a few attributes that set it apart from its competition.

For one, Ansible is agent-less. In other words, there is no software to deploy across your enterprise. You could install the Ansible package on your laptop and manage thousands of servers across bare metal, virtual machines, and even the cloud!

Being agentless also opened the door for another advantage: Ansible utilizes OpenSSH to execute remote commands instead of proprietary or platform-specific tools.

Thirdly, Ansible set itself apart by choosing simple, YAML-based text files to define its environments and code. Want to have a pre-defined list of servers to manage? Add it to an inventory file! Want to use Ansible to create a user, set its password, and add an SSH key? Write a playbook. Want to have support for different environments (dev, prod, etc.)? Easy, just create a variable file!

Getting Started

Did I sell you on how easy and awesome Ansible is? Good, because here is the entrée for today’s meal: Let’s install Ansible and use Ansible to add a package on our local system. For the sake of this demonstration, I’ll be using one of my favorite server distros, Fedora Server, specifically Fedora 34. Ansible is available for most major distros, so, consult your package manager to find the correct package.

The first step is to install the required Ansible package and its dependencies:

[ansible@fedora-server-34 ~]$ sudo dnf install -y ansible
Last metadata expiration check: 0:05:30 ago on Tue 22 Jun 2021 04:13:57 PM CDT.
Dependencies resolved.
===============================================================================================================================================================================================================
 Package                                                    Architecture                                Version                                             Repository                                    Size
===============================================================================================================================================================================================================
Installing:
 ansible                                                    noarch                                      2.9.21-1.fc34                                       updates                                       15 M
Installing dependencies:
 libsodium                                                  x86_64                                      1.0.18-7.fc34                                       fedora                                       165 k
 python3-babel                                              noarch                                      2.9.1-1.fc34                                        updates                                      5.8 M
 python3-bcrypt                                             x86_64                                      3.1.7-7.fc34                                        fedora                                        44 k
 python3-cffi                                               x86_64                                      1.14.5-1.fc34                                       fedora                                       244 k
 python3-chardet                                            noarch                                      4.0.0-1.fc34                                        fedora                                       214 k
 python3-cryptography                                       x86_64                                      3.4.6-1.fc34                                        fedora                                       1.4 M
 python3-idna                                               noarch                                      2.10-3.fc34                                         fedora                                        99 k
 python3-jinja2                                             noarch                                      2.11.3-1.fc34                                       fedora                                       493 k
 python3-jmespath                                           noarch                                      0.10.0-1.fc34                                       updates                                       46 k
 python3-markupsafe                                         x86_64                                      1.1.1-10.fc34                                       fedora                                        32 k
 python3-ntlm-auth                                          noarch                                      1.5.0-2.fc34                                        fedora                                        53 k
 python3-ply                                                noarch                                      3.11-11.fc34                                        fedora                                       103 k
 python3-pycparser                                          noarch                                      2.20-3.fc34                                         fedora                                       126 k
 python3-pynacl                                             x86_64                                      1.4.0-2.fc34                                        fedora                                       110 k
 python3-pysocks                                            noarch                                      1.7.1-8.fc34                                        fedora                                        35 k
 python3-pytz                                               noarch                                      2021.1-2.fc34                                       fedora                                        49 k
 python3-pyyaml                                             x86_64                                      5.4.1-2.fc34                                        fedora                                       194 k
 python3-requests                                           noarch                                      2.25.1-1.fc34                                       fedora                                       114 k
 python3-requests_ntlm                                      noarch                                      1.1.0-14.fc34                                       fedora                                        18 k
 python3-urllib3                                            noarch                                      1.25.10-4.fc34                                      fedora                                       175 k
 python3-xmltodict                                          noarch                                      0.12.0-11.fc34                                      fedora                                        23 k
 sshpass                                                    x86_64                                      1.09-1.fc34                                         fedora                                        27 k
Installing weak dependencies:
 python3-paramiko                                           noarch                                      2.7.2-4.fc34                                        fedora                                       287 k
 python3-pyasn1                                             noarch                                      0.4.8-4.fc34                                        fedora                                       133 k
 python3-winrm                                              noarch                                      0.4.1-2.fc34                                        fedora                                        79 k

Transaction Summary
===============================================================================================================================================================================================================
Install  26 Packages

Total download size: 25 M
Installed size: 143 M
Downloading Packages:

<<< Output Truncated >>>            

Complete!
[ansible@fedora-server-34 ~]$

Excellent, feel the power yet? Let’s get a little crazy. Let’s write a playbook. Let’s install a package!

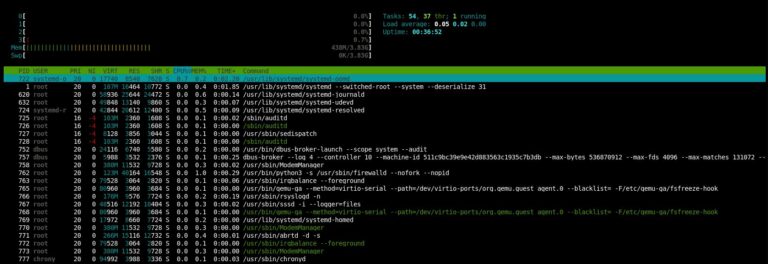
I really like htop. It is a “graphical” tool that, in this author’s opinion, makes it much easier to read and understand the output of the top command.

Luckily, it’s available from the default Fedora repos. So, using your favorite text editor, create htop.yml:

---
- name: installing packages
  hosts: localhost
  become: yes
  tasks:
    - name: install htop
      package:
        name: htop
        state: latest

What’s all this mean? Let’s break it down line by line. Make sure to start your playbook with three hyphens (-), then name tags are just that, it lets you know what task is being run to make it easier to understand the output (and especially troubleshoot any problems). Next, we have the hosts. For this super-simple example, we are only calling localhost. This could also call any number of hostnames or groups listed in an inventory file. Become is basically your sudo command. If you set Become to yes, Ansible will run with administrative privileges. Otherwise, the playbook will run as whatever user calls the playbook.

Under tasks, we have another name tag. We are calling the package module. This is what is so cool about Ansible; you can actually build playbooks that will run over differing distributions! The package module is intuitive enough to know what your system’s package manager is: apt for Ubuntu, yum for CentOS, dnf for Fedora, and so on. Next, we call the package, in our case, htop. The final line is the state of the package. We can set this to a specific version, to absent (if we don’t want the called package installed), or latest, which (you guessed it!) means the package will be on the latest version.

Now, save your config file, and let’s run our playbook:

[ansible@fedora-server-34 ~]$ rpm -qa|grep htop
[ansible@fedora-server-34 ~]$ ansible-playbook htop.yml 
[WARNING]: provided hosts list is empty, only localhost is available. Note that the implicit localhost does not match 'all'

PLAY [installing packages] ************************************************************************************************************************************************************************************

TASK [Gathering Facts] ****************************************************************************************************************************************************************************************
ok: [localhost]

TASK [install htop] *******************************************************************************************************************************************************************************************
changed: [localhost]

PLAY RECAP ****************************************************************************************************************************************************************************************************
localhost                  : ok=2    changed=1    unreachable=0    failed=0    skipped=0    rescued=0    ignored=0   

[ansible@fedora-server-34 ~]$ rpm -qa|grep htop
htop-3.0.5-4.fc34.x86_64
[ansible@fedora-server-34 ~]$

You can see htop is not installed before we run our playbook, then after we run it, htop is indeed present!

Wrap Up

So, there you have it. You now have the power to go out and install a package on any SSH-enabled host system. Go forth and blow people’s minds! When you take this simple example and zoom out, you start to see the sheer power that Ansible can bring to a Systems Administrator. Step aside, Luke Skywalker, we don’t need the Force anymore to move your X-Wing. We’ll do it with Ansible!

Okay…That may be over the top. However, I can’t overstate the truth: Build out your playbooks. Grow your Ansible skills. The rule is, if you have to do a task more than once: AUTOMATE IT! Stop installing packages by hand. Quit wasting your time bootstrapping servers by copy-pasting commands out of a shared document. Take those commands, add in some Jinja-variable goodness, and let computers do what they were meant to do: make the lives of humans easier.

Need some more ideas to get you going? No problem! Ansible has AH-MAZE-ZING documentation and an awesome Getting Started landing page.

Like a terrible TV infomercial, just wait, there’s more! Have a favorite open source project you like or a system service that you tend to modify? You may not even have to start from scratch! Ansible has galaxies (pun intended) of pre-built roles and playbooks available. Ansible Galaxy is a community-driven effort to provide pre-built code to get your systems up and running fast. They have playbooks for Nextcloud Server, LAMP, and even desktop applications!

I use Ansible every time I build out a new VM. I use Ansible to ensure my user account is configured exactly the same way across all my systems: laptop, desktop, server, VMs, and cloud! Admittedly, my list of Ansible To-Dos is still fairly large, however, I try to spend a little time each month adding to it. Slowly but surely, I am automating and standardizing my home lab and home production systems. You can too!

Let me know below how you are or are planning to use Ansible.

Did you like this post? Let me know in the comments if there is more you’d like to read on this topic. There is SO much more we could talk about from products like Red Hat’s Ansible Tower (or the upstream AWX project) to large-scale use cases, bootstrapping, and more. So, by all means, let me know what you are interested in.

Thank you so much for spending your valuable time to hear my “war stories” and letting me share a tool with you I am quite passionate about.

(This post originally appeared here and is used with permission.)