In How I built a homelab with Red Hat Enterprise Linux (RHEL), I laid out my plans for revamping my home lab using as many Red Hat Enterprise Linux (RHEL) and Red Hat-adjacent tools as I could get my hands on.
My goals are:
- Learn the processes.
- Teach others some systems administration good practices.
- Automate my homelab as much as possible.
The first article covered my goals and the process for building a new “non-production” RHEL 9 virtual machine to act as a jump server and collection point for different configuration files, scripts, and the like.
I built a basic server and added only a few tools, such as the web console and Image Builder. In this article, I will focus on building a customized template that:
- I can deploy repeatedly.
- I can automate its upkeep.
What is Image Builder?
The short version is that Image Builder is the intended future installation experience for RHEL. Image Builder is not a product but a feature within the distribution.
With Image Builder, administrators can deploy different RHEL versions on different platforms (hardware, virtual, cloud) with different configurations. There are three ways to interact with Image Builder:
- A web service through the Red Hat Console
- A web-UI-based tool
- A command line-based tool
Build the first image
A vanilla image should be enough to get started. This image undoubtedly will be one of many I create throughout this project. I’m starting with the web console (Cockpit) Image Builder application to get the ball rolling. The URL to connect to it is: https://{hostname}:9090/composer.
If you don’t have Image Builder installed yet, you can install it with DNF:
# dnf install -y cockpit-composer.noarchThen enable the socket to start automatically:
# systemctl enable --now osbuild-composer.socketNow you can access Image Builder using the web console:

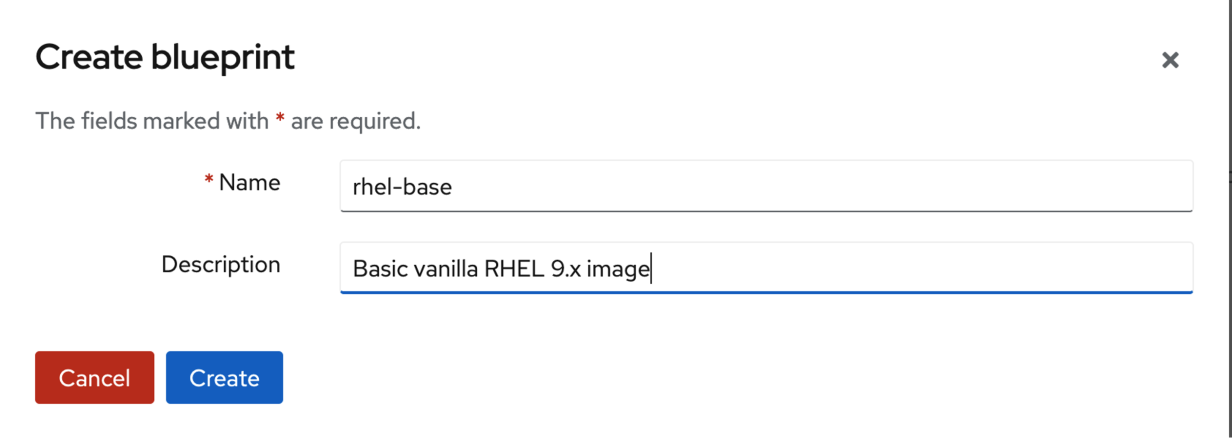
Use the Create blueprint wizard to define what the initial image should look like. Start by giving the image a helpful name and description:
The next step is to decide what output format the image should be. Since my bare-metal server will be a hypervisor for my rebuilt lab, a QEMU-based qcow2 image makes the most sense; your environment may dictate differently.
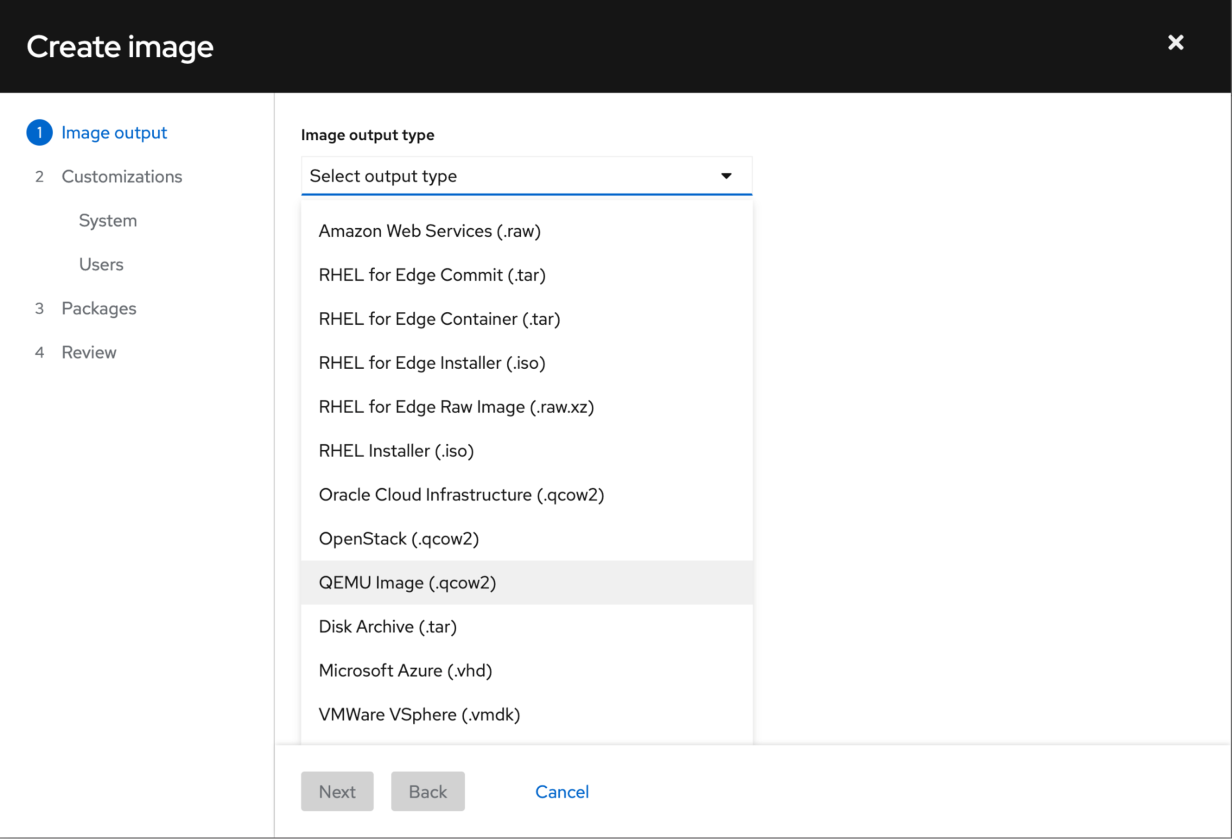
The first step in the wizard also asks what the Image Size should be. The default and minimum are 2GB. For now, this should be fine.
I’ll move on to customizations. The next screen shows the option to pick a hostname. I will leave this blank and assign a hostname later when I deploy these images.

Next, define a user. I will create a service account named ansible so that I can easily deploy system roles across a small test environment (as I’ll do in the next article in this series).
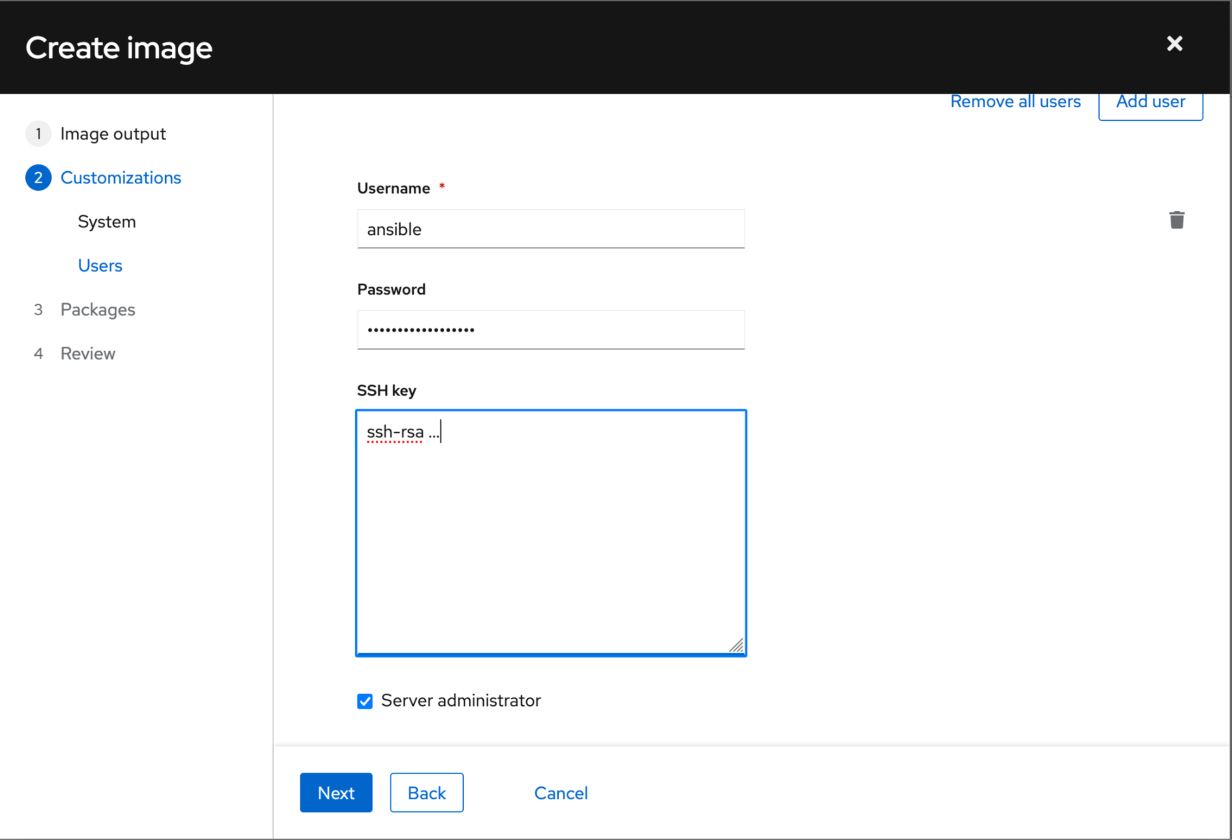
Don’t forget to assign a password and create an SSH key. Adding a key here provides everything needed to use the ansible account across the fleet. Also, check the Server administrator box to add the ansible account to the wheel group.
Next, I’ll add a few packages I want across my fleet. Again, your choices here may vary. I’ve only added a couple for now, such as tmux and vim-enhanced.
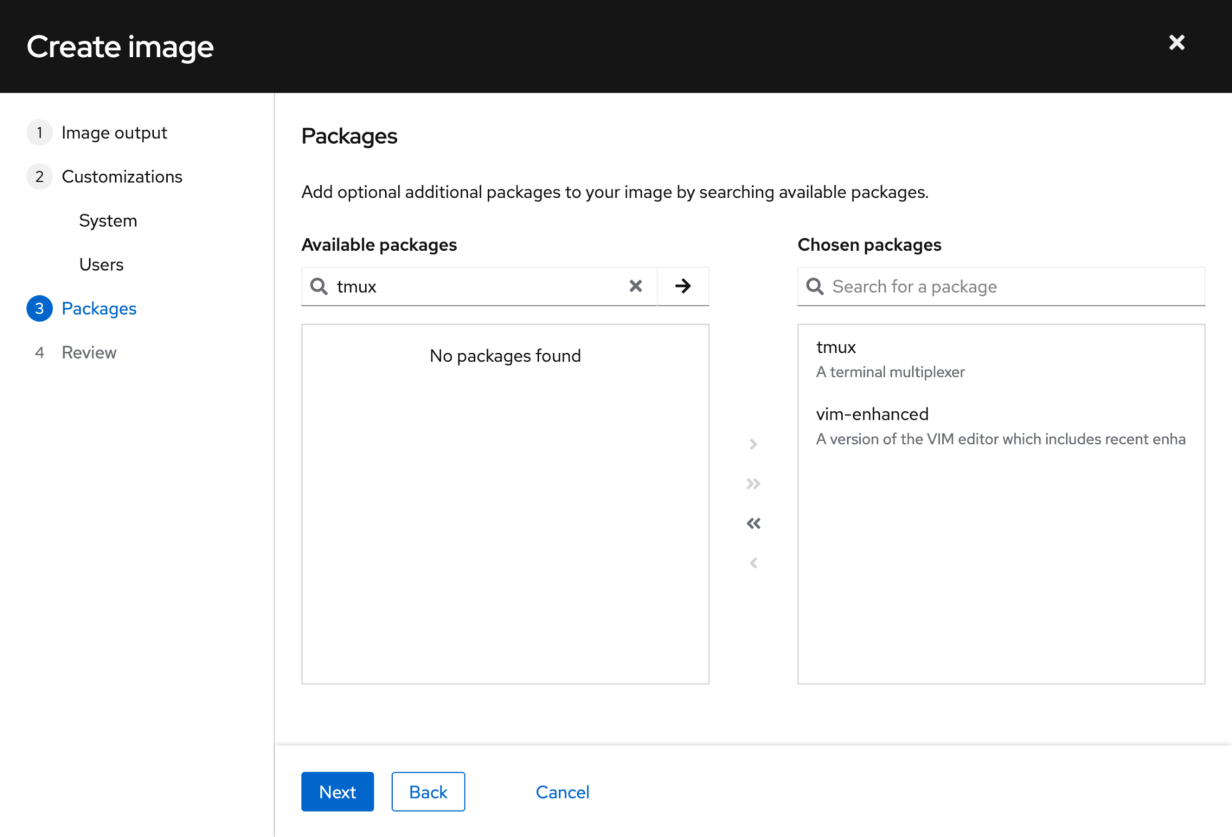
Finally, review the configuration and save the blueprint.
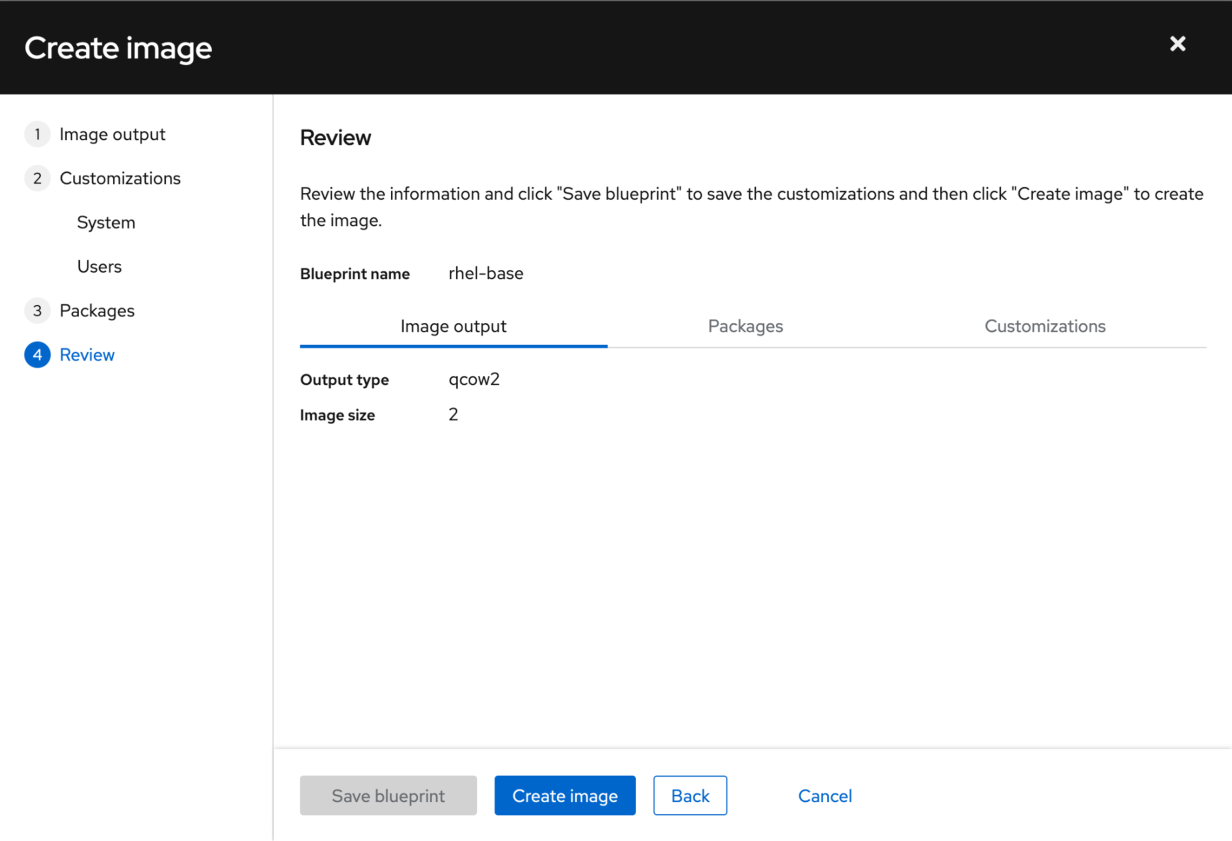
Create an image
You just created a blueprint for a RHEL 9 virtual machine (VM). Think of this as a recipe for a meal you will prepare. It’s time to try it.
Either from the wizard you just walked through or from the main page of the Image Builder app, select Create image to begin the build process.


In the background, Image Builder pulls all the relevant packages from the Red Hat Content Delivery Network (CDN), defines the filesystem layout, and builds the boot image.
Depending on your hardware and internet connection, this process takes a few minutes. But when the image is complete, you won’t immediately have to go in and update all your packages.

Once the image finishes, you can use the qcow2 artifact to build the first test client machine. The easiest way is to use your browser’s Download functionality to grab the qcow2 file and upload it to your test environment.

However, I want to make additional changes to my image before deploying it.
Add features to the vanilla image
I want to ensure I have a well-defined image before deploying it repeatedly. To do this, I will switch tools.
The local, web-based Image Builder tends to be the slowest to get new features due to its ties to the RHEL release development process. It currently lacks a built-in mechanism for updating templates regularly. Remember, the goal for this lab is to operate as hands-off as possible.
I’ll use SSH to connect to the jump server for this step. I don’t plan on this jump server living a long life, so I don’t have to worry about creating a user account or importing any of the preferences. This approach is not advisable for production or long-lived servers, but I’ll fix this later with the golden image.
I pulled some knowledge from a couple of different tools for this next part:
(In this industry, it is often not what you know, but whether you know how and where to find the knowledge you need.)
Next, install the tools:
# composer-cli blueprints list
rhel-base

# composer-cli blueprints save rhel-base

# vim rhel-base.toml

name = "rhel-base"
description = "Vanilla RHEL 9.x"
version = "0.0.2"
modules = []
groups = []
distro = ""

[[packages]]
name = "tmux"
version = "*"

[[packages]]
name = "vim-enhanced"
version = "*"

[customizations]

[[customizations.user]]
name = "ansible"
description = "Ansible Service Account"
password = " <redacted> "
key = " <redacted> "
groups = ["wheel"]
Make a few additions:
name = "rhel-base"
description = "Vanilla RHEL 9.x"
version = "0.0.2"
modules = []
groups = []
distro = ""

[[packages]]
name = "tmux"
version = "*"

[[packages]]
name = "vim-enhanced"
version = "*"

[[packages]]
name = "cockpit"
version = "*"

[customizations]

[[customizations.filesystem]]
mountpoint = "/var/log"
size = "4 GiB"

[customizations.services]
enabled = ["cockpit"]

[[customizations.user]]
name = "ansible"
description = "Ansible Service Account"
password =  <redacted> "
key = " <redacted> "
groups = ["wheel"]
I added stanzas for Cockpit (the web console) and an enabled services section to ensure the web console starts on boot.
You can add a 4GB filesystem for /var/log. (You can always add more later.)
Finally, add a user description for the Ansible service account. You can also check the documentation for additional customization ideas.
For now, though, import the modified blueprint and execute a build:
# composer-cli blueprints push rhel-base.toml

# composer-cli compose start rhel-base qcow2
Compose bb259a2e-cbd6-4fe9-99bf-3a9b28e2cbcf added to the queue
You can keep an eye on the build by running the status command:
# composer-cli compose status
bb259a2e-cbd6-4fe9-99bf-3a9b28e2cbcf RUNNING  Mon Feb 20 15:50:14 2023 rhel-base   	0.0.3 qcow2
209cfd00-a57b-4458-8de0-df0942e2cc65 FINISHED Mon Feb 20 15:05:26 2023 rhel-base   	0.0.1 qcow2        	2147483648
Once done, the build will show a FINISHED status like when the job kicked off from the web console earlier. I’ll hold onto the finished qcow2 image for the next article.
Automate future builds
Now I have a good image I can duplicate to build and test what will eventually become my golden image. This planned image will have as many of the latest updates as possible, the preferred packages, user data, and filesystems.
From there, I’ll be able to add more layers of packages and configurations to the base image to build out the different services I’ll be hosting in the lab.
However, I don’t want to worry about creating a new image manually. As the tool evolves, there will be better options for this, but for today, I plan on using systemd timer to build an updated image on a scheduled basis.
I’m adding a systemd timer to trigger a rebuild every Sunday night. (Did you know about creating your own systemd timers? I didn’t! I found the article Use systemd timers instead of cronjobs during my research!)
First, you need to create a systemd service to call the composer command:
# vim /etc/systemd/system/composerBuild.service

	[Unit]
	Description=Rebuilds a vanilla RHEL template through image builder
	Wants=composerBuild.timer

	[Service]
	Type=oneshot
	ExecStart=/bin/composer-cli compose start rhel-base qcow2

	[Install]
	WantedBy=multi-user.target
Second, create a systemd timer to call the service:
# vim /etc/systemd/system/composerBuild.timer

	[Unit]
	Description=Timer to rebuild vanilla RHEL template using image builder
	Requires=composerBuild.service

	[Timer]
	Unit=composerBuild.service
	OnCalendar=Sun

	[Install]
	WantedBy=timers.target

# systemctl enable composerBuild.timer
As a paranoid sysadmin, I want to verify that the timer is working:
# systemctl status *timer

… output truncated …

● composerBuild.timer - Timer to rebuild vanilla RHEL template using image builder
 	Loaded: loaded (/etc/systemd/system/composerBuild.timer; enabled; vendor preset: disabled)
 	Active: active (waiting) since Thu 2023-02-23 12:04:13 CST; 2min 14s ago
  	Until: Thu 2023-02-23 12:04:13 CST; 2min 14s ago
	Trigger: Sun 2023-02-26 00:00:00 CST; 2 days left
   Triggers: ● composerBuild.service
Keep in mind this is a “quick-and-dirty” approach. As I add tools like Ansible Automation Platform and Red Hat Satellite, I’ll have better options for automating the process of providing up-to-date templates to deploy.
Wrap up
I covered a lot of ground in this article. I am enjoying the process and looking forward to seeing what the lab looks like on the other side of this series!
Here, I talked about the ideas of a golden image and took steps toward building the first couple of client systems that I’ll use in the next article.
Next time, I will take the test systems and add RHEL system roles to the golden image. System roles are a codified method of configuring Linux subsystems such as firewalls and SSH using ansible-core and deploying these configurations at scale.
If you follow this series, I would love to connect with you. You can easily find me online.
This article originally appeared on the Enable SysAdmin blog.


