For a systems administrator, it seems like every project brings new complexity, more servers, and more sprawl to manage. I will assume that your messes are a lot like mine: On one server, you’re running CentOS Linux 7 from a project several years ago. Over here, you have a handful of Red Hat Enterprise Linux (RHEL) 9 servers from a recent project. Over there, you have an Oracle RAC database running on Oracle Linux 8.
No matter where you look, you have a mix of different distributions on different major and minor versions. What is a hard-working sysadmin to do? Never fear; the IT Guy is here, and as Terry Bowling and I did in our 2022 Red Hat Summit talk, I will walk you through a couple of tools to help you bring some order to the chaos in your infrastructure.
Why I standardized on Red Hat Enterprise Linux
In all my years as a sysadmin, I’ve never had a better experience managing a Linux operating system than with RHEL. I know what you are thinking: “This guy works for Red Hat; of course, he would say that operating system is the best.” Rest assured, my love for RHEL long predates ever receiving a paycheck with a red fedora.
One reason is that RHEL is open source, which is critical to the development and sustainability of the entire Linux ecosystem and, to a real extent, the world of technology we enjoy. For another reason, Red Hat has always been a vendor I love talking to, in contrast to the ones I wanted to get out of the door as quickly as possible because all they cared about was the upsell.
If I were to start a business, manage a large bank, or control a space station, I would put RHEL at the heart of it. The main reasons are security certifications, an unmatched partner ecosystem, and a suite of management tools built right into the subscription in the form of Red Hat Insights.
I could talk about how much I love RHEL all day, but I’ll move along. Assume I have convinced you that RHEL is the way to go, so how do you standardize on it without rebuilding hundreds or even thousands of servers?
That is where the Convert2RHEL tool comes into play. Convert2RHEL is a supported utility that replaces existing packages with Red Hat-signed versions. So you can replace your CentOS Linux kernel with the RHEL kernel and a third-party MariaDB version with the Red Hat version. You get the idea. Modern systems can have anywhere from 500 to 1,000 or more packages, and the Convert2RHEL tool handles the conversion process. It also ties the converted system into your Red Hat Access account, allowing you to install packages, get support, and connect to tools like Insights and Red Hat Satellite.
I mentioned a crucial term in the paragraph above: supported. Convert2RHEL is a supported operation. If you run into issues, you can open a support ticket or even talk to Red Hat Consulting to get advice and build a plan for a standardized platform. Need to carry out a bulk conversion? You can automate the process with Satellite.
Get started with Convert2RHEL
To get started with Convert2RHEL, you can follow the commands and screenshots in this article or watch the complete process in this video:
I will walk through this process with a vanilla CentOS Linux 7 virtual machine (VM). To make life easier, before you do anything, ensure all your packages are up to date:
$ sudo dnf update -yWith that done, run three curl commands to pull down the GNU Privacy Guard (GPG) key, SSL certificate, and repository confirmation necessary to pull the convert2rhel packages from the Red Hat content delivery network (CDN):
$ curl -o /etc/pki/rpm-gpg/RPM-GPG-KEY-redhat-release https://www.redhat.com/security/data/fd431d51.txt
  % Total	% Received % Xferd  Average Speed   Time	Time 	Time  Current
                             	Dload  Upload   Total   Spent	Left  Speed
100  1855  100  1855	0 	0  11393  	0 --:--:-- --:--:-- --:--:-- 11380

$ curl --create-dirs -o /etc/rhsm/ca/redhat-uep.pem https://ftp.redhat.com/redhat/convert2rhel/redhat-uep.pem
  % Total	% Received % Xferd  Average Speed   Time	Time 	Time  Current
                             	Dload  Upload   Total   Spent	Left  Speed
100  7411  100  7411	0 	0  28684  	0 --:--:-- --:--:-- --:--:-- 28724

$ curl -o /etc/yum.repos.d/convert2rhel.repo https://ftp.redhat.com/redhat/convert2rhel/7/convert2rhel.repo
  % Total	% Received % Xferd  Average Speed   Time	Time 	Time  Current
                             	Dload  Upload   Total   Spent	Left  Speed
100   247  100   247	0 	0   1080  	0 --:--:-- --:--:-- --:--:--  1083
Now it’s time for the main event: The conversion. Be forewarned; depending on your underlying hardware and the complexity of your client install, this process could take some time.
$ sudo convert2rhel --org 12345678 --activationkey SuperSecretI’ll break this command down. First, convert2rhel calls your newly installed tool. The --org flag allows you to specify your Red Hat Access organization ID, and --activationkey allows you to select a key. These two arguments let you register your converted RHEL server to your active Red Hat subscription.
For more information on using org ID and activation keys, check out the documentation.

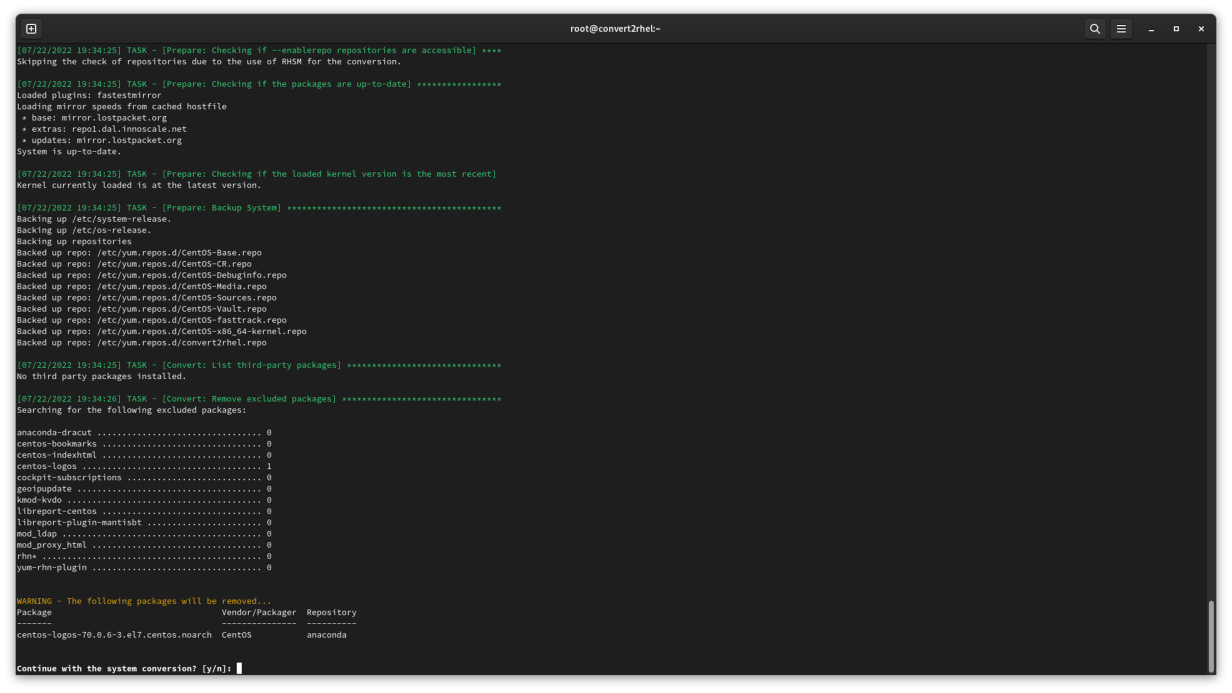
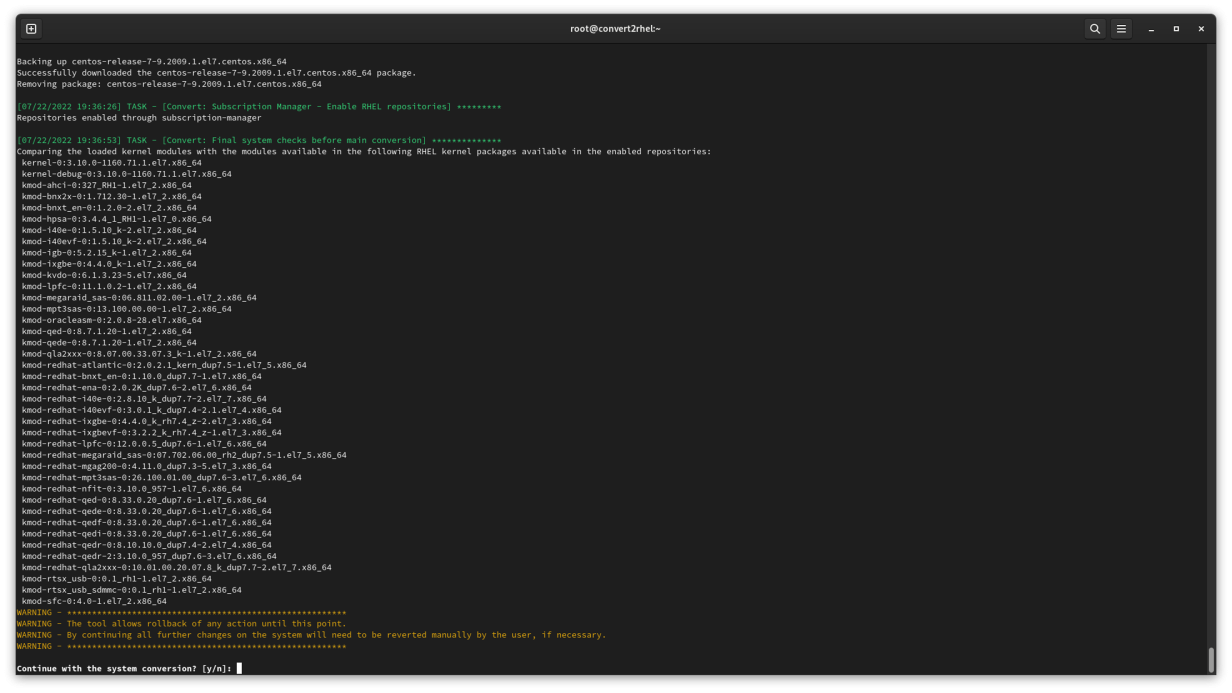
Once you start the conversion process, you are presented with the RHEL end-user license agreement (EULA) and asked if you are sure you are ready to proceed. Once all the preconversion checks are complete and the Red Hat packages staged, you can reboot the system.

Up to this point, no changes have been made to the system. However, once you tell the instance to reboot, everything starts happening.
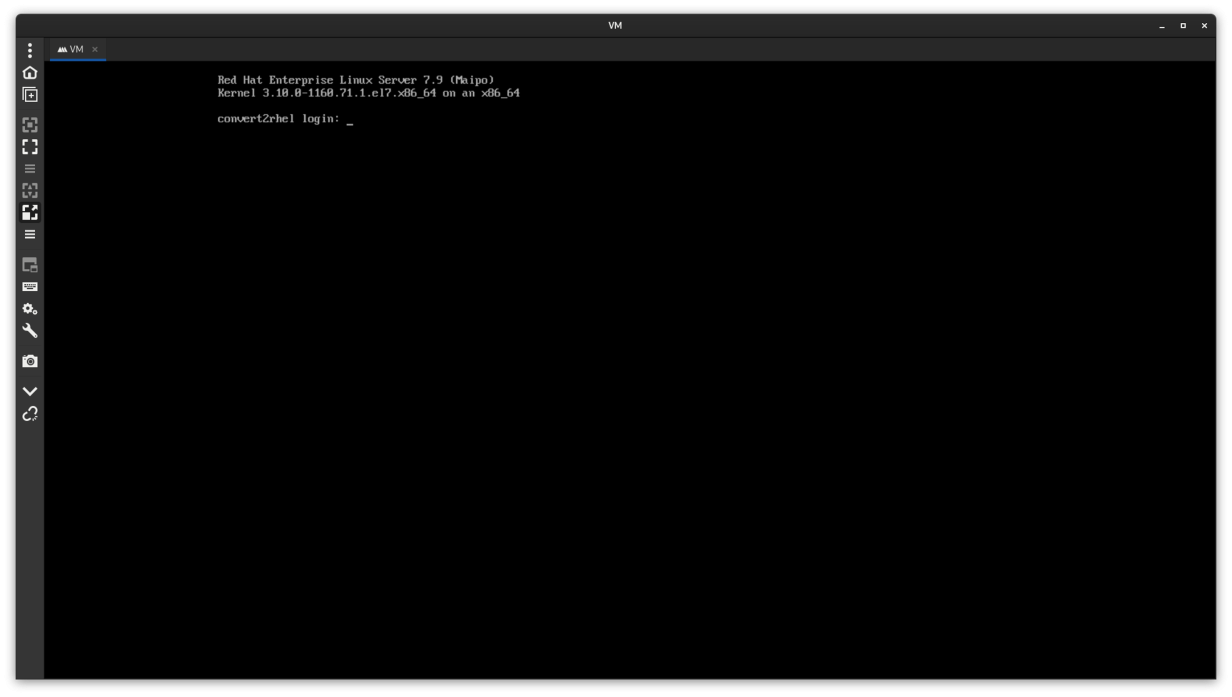
After you hit Enter, your system boots into a temporary environment. Convert2RHEL will replace all the CentOS-signed packages with their Red Hat-signed equivalents.

Standardize on major versions
That wasn’t so hard, right? Now that you’ve trimmed the number of distributions you have to manage to one, you need to do something about the environment’s version sprawl. You may have 7.9, 8.4, 8.5, 8.6… you get the idea. To give the newly standardized environment the most runway, consider upgrading all of your servers to the latest major version.
For one thing, RHEL 8 and 9 have a predictable lifecycle: five years of full support (such as new features and hardware enablement) followed by five years of maintenance support (for example, bug fixes and security patches). That gives you 10 years total. You can also expect a new minor version every six months and a new major version every three years. Since RHEL 9 was released in May 2022, you can expect RHEL 10 in summer 2025.
However, if the “latest and greatest” gives you pause, Red Hat has an Extended Update Support (EUS) release. This allows you to upgrade to a minor version with two years of support.
A predictable release cadence makes life easier for operations teams. Remember having to make the switch from init to systemd? Yeah, frustrating. What was that command again? Oh, wait, no, that was that other server. Is this server running Podman? Nope, no containers. I feel your pain.
How can you relieve those annoying issues and provide your infrastructure with a steady state of major release cycles?
Do in-place upgrades with Leapp
There is also a supported utility to help sysadmins navigate from one major version to the next. That tool is Leapp, a solution for in-place upgrades.
Why do an in-place upgrade versus a clean install? It’s cheaper, and I don’t mean dollars. I mean your time. Your time and energy have great value. With a new build, you must install all your packages from scratch, create all your users (with passwords), and reapply all the little tweaks and configuration changes. It takes time and effort that you could spend doing so many other things.
The Leapp utility is available from the Base OS repository on RHEL 8 systems and in an add-on repository for RHEL 7 systems with a dnf install command. Leapp is also a supported operation, so if you run into trouble, you can always reach out to Red Hat’s support teams to get a fresh set of eyes.
One other aside: Leapp for RHEL 7 and 8 means you can take a RHEL 7 box, upgrade it to a RHEL 8 box, and then rerun Leapp to get to a RHEL 9 server. Granted, that depends on the workloads, library versions, and other factors you may be running.
Note: If you want to see the upgrade process for RHEL 7 servers, check out this video:
If you already have a RHEL system registered and up to date, it is an easy process to install the Leapp utility:
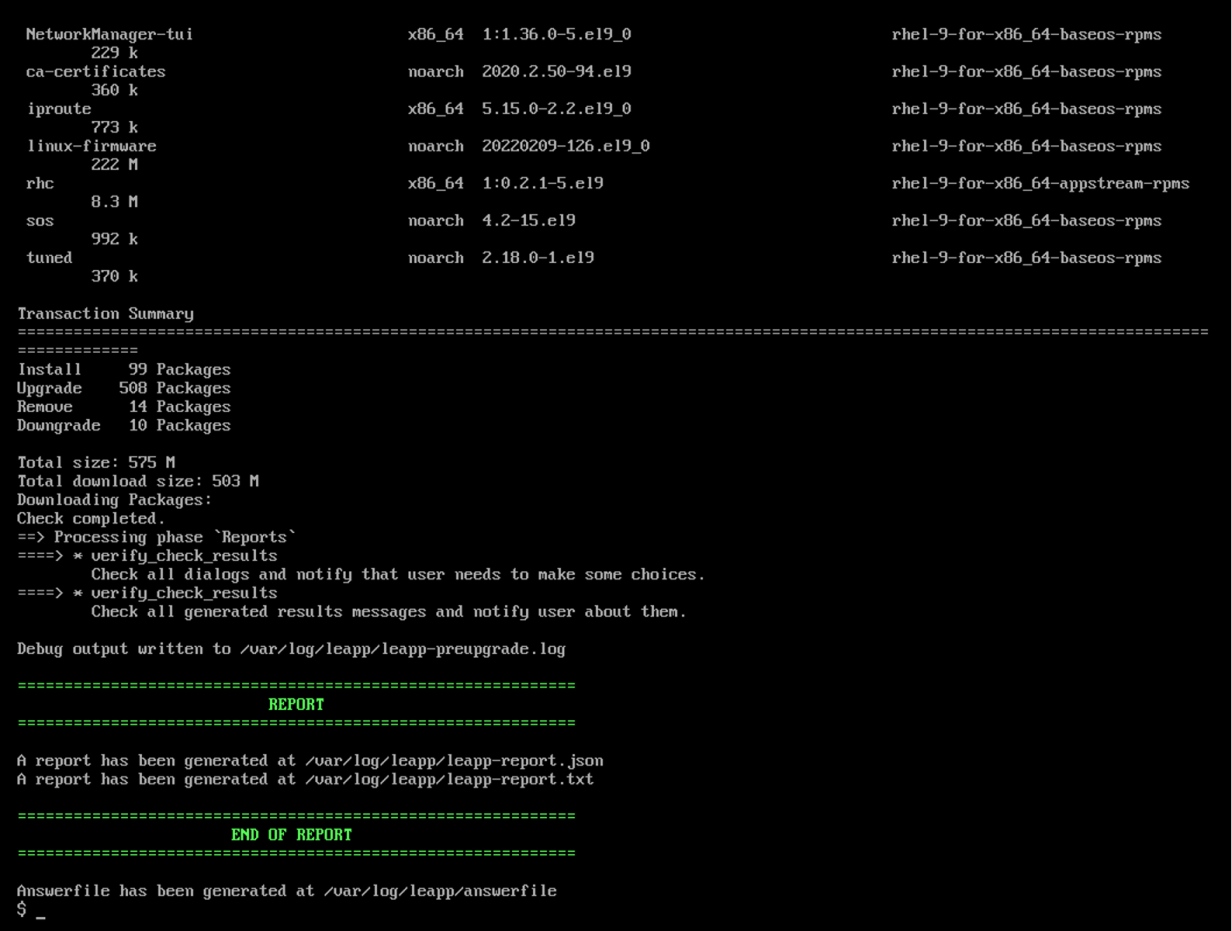
$ sudo dnf install -y leapp-upgradeTo evaluate that an in-place upgrade will be successful, the tool’s preupgrade assistant audits all your packages, repositories, and configurations to identify potential pitfalls or blockers that may interfere with a successful upgrade. The tool helps you identify issues that could cause failures.

When the preupgrade assistant shows no inhibitors, you can proceed with the upgrade. If it identifies an inhibitor, you can get the details in the /var/log/leapp/leapp-preupgrade.log file. You can also add workarounds or skip certain operations by adding those options to the /var/log/leapp/answerfile. This option makes the upgrade process less manually intensive. Not only will this tool help you identify potential issues, but you can also take those notes and feed them into an answer file to further automate this process.
With the upgrade assessment in the green, start the upgrade. I like to add the --reboot option so that I don’t have to manually reboot the system after the upgrade process begins:
$ sudo leapp upgrade –-rebootAt this point, Leapp gets to work. This process may take some time, depending on the size and complexity of your installation. It downloads all new packages, from the kernel to OpenSSL to Vim and more. It also builds a new boot image to support the new environment.

Once the packages are all in place and the new boot image created, all that’s left is for the system to reboot itself. When you return to a login prompt, you are ready to go!

Wrap up
Sitting on the floor next to my desk is a workstation that has been running since Fedora 29. I’ve done in-place upgrades up to Fedora 36, and the process has gotten better, faster, and more accessible. This is the foundation of the Leapp tool for RHEL. Red Hat depends heavily on upstream communities to help shape the future of RHEL.
Convert2RHEL and Leapp have seen a lot of adoption in the community and received a steady amount of engineering attention, making the process faster and easier. These two tools aim to help make your job easier by managing that infrastructure sprawl, cutting down technical debt, and providing a firmer foundation for any workloads thrown your way.
What will you do with all that newfound free time? Will you take that vacation? Learn a new technology? Knock out other projects? Or just take a nap? There is no wrong answer. As sysadmins, it is our job to enable our businesses to be successful, but that doesn’t mean we should have to toil!
Head to the migrations page and start planning your standardization project today!
This article is based on What’s new with Red Hat Enterprise Linux migrations: Convert2RHEL and Leapp upgrades, presented at Red Hat Summit in May 2022 and was originally published on the Enable SysAdmin blog.

