Way back in the day, humanity created computers to help make our lives easier. In a lot of ways, they have; in others, it’s made life much more tedious, especially for the SysAdmin. What used to be a mainframe has turned into hundreds of servers, containers, and virtual machines spread across data centers, clouds, and even laptops!
Never fear, Infrastructure as Code (IaC) is here. Tools like Ansible have been around for over a decade or more but in the past few years they have really picked up speed. Ansible is a simple, efficient approach to automating and standardizing our environments while cutting down on the time, increasing reliability, and removing the human error factor from operations and deployments!
My Story
Probably around 2012 or so, I was a rookie Linux Systems Administrator just making the move away from managing Windows servers and desktops. I remember how much fun patch days were…at first. We got to take the morning off, spend an evening at our off-site data center, order in some Jimmy John’s, and once the corporate office closed, start patching systems. We ran CentOS, RHEL, Oracle Enterprise, and maybe even an Ubuntu system or two.
Looking back, it was actually an unnecessary time suck! Why!? Patch a couple of hundred servers, by hand, rebooting systems manually, and hoping that nothing broke because the application and database administrators were already at home enjoying the end of their workday. The one saving grace at that point was Tmux (an amazing tool to manage multiple terminal sessions at once). At least then I didn’t have to type yum update 200 times!
I guess Charles Dickens might have said of my career: “It was the best of times, it was the worst of times…” I finally got to focus on Linux Servers, bye-bye Windows, but who wants to spend their Thursday nights patching a couple of hundred servers by hand?
That’s not why you’re here, though. You all know I have my SysAdmin scars and I wear them with pride because now, I get to share amazing lessons I learned (or in today’s case should have learned back then). Today, I want to introduce a tool that could have taken our patching times from 6-7 hours down to what could have been less than an hour. Even more, that process could have been completely automated!
What is Ansible?
Ansible is a project bred from the idea that all infrastructure (even security, networking, and cloud) should be code. In other words, if you think of your lab, network, enterprise, whatever as a restaurant, Ansible would be the recipes the cooks used to make every dish. Ansible is written predominantly in Python and utilizes YAML or “YAML Ain’t Markup Language” (who doesn’t love a good recursive acronym?) for its playbooks.
Ansible, not to be confused with the Red Hat product Ansible Automation Platform, is an open-source project that runs across most Linux and Unix systems as well as Mac and Windows and even networking gear, clouds, and security appliances! The list of modules and supported platforms grows with every release.
[ansible@fedora-server-34 ~]$ ansible --version
ansible 2.9.21
  config file = /etc/ansible/ansible.cfg
  configured module search path = ['/home/ansible/.ansible/plugins/modules', '/usr/share/ansible/plugins/modules']
  ansible python module location = /usr/lib/python3.9/site-packages/ansible
  executable location = /usr/bin/ansible
  python version = 3.9.5 (default, May 14 2021, 00:00:00) [GCC 11.1.1 20210428 (Red Hat 11.1.1-1)]
[ansible@fedora-server-34 ~]$
The name was inspired by Rocannon’s World, a novel by Ursula K. Le Guin. In the 1966 novel, ansible was a fictional, instantaneous communication system. Ansible would later become the name of the open-source tool. Michael DeHann, the original developer decided to build a company around his new tool and with the help of Said Ziouani and Timothy Gerald founded AnsibleWorks Inc. Later, the company was renamed Ansible Inc and eventually was acquired by Red Hat in 2015.
Why Ansible?
Ansible burst onto the field in an age where Infrastructure As Code (IaC) tools seemed to be everywhere. However, Ansible had a few attributes that set it apart from its competition.
For one, Ansible is agent-less. In other words, there is no software to deploy across your enterprise. You could install the Ansible package on your laptop and manage thousands of servers across bare metal, virtual machines, and even the cloud!
Being agentless also opened the door for another advantage: Ansible utilizes OpenSSH to execute remote commands instead of proprietary or platform-specific tools.
Thirdly, Ansible set itself apart by choosing simple, YAML-based text files to define its environments and code. Want to have a pre-defined list of servers to manage? Add it to an inventory file! Want to use Ansible to create a user, set its password, and add an SSH key? Write a playbook. Want to have support for different environments (dev, prod, etc.)? Easy, just create a variable file!
Getting Started
Did I sell you on how easy and awesome Ansible is? Good, because here is the entrée for today’s meal: Let’s install Ansible and use Ansible to add a package on our local system. For the sake of this demonstration, I’ll be using one of my favorite server distros, Fedora Server, specifically Fedora 34. Ansible is available for most major distros, so, consult your package manager to find the correct package.
The first step is to install the required Ansible package and its dependencies:
[ansible@fedora-server-34 ~]$ sudo dnf install -y ansible
Last metadata expiration check: 0:05:30 ago on Tue 22 Jun 2021 04:13:57 PM CDT.
Dependencies resolved.
===============================================================================================================================================================================================================
 Package                                                    Architecture                                Version                                             Repository                                    Size
===============================================================================================================================================================================================================
Installing:
 ansible                                                    noarch                                      2.9.21-1.fc34                                       updates                                       15 M
Installing dependencies:
 libsodium                                                  x86_64                                      1.0.18-7.fc34                                       fedora                                       165 k
 python3-babel                                              noarch                                      2.9.1-1.fc34                                        updates                                      5.8 M
 python3-bcrypt                                             x86_64                                      3.1.7-7.fc34                                        fedora                                        44 k
 python3-cffi                                               x86_64                                      1.14.5-1.fc34                                       fedora                                       244 k
 python3-chardet                                            noarch                                      4.0.0-1.fc34                                        fedora                                       214 k
 python3-cryptography                                       x86_64                                      3.4.6-1.fc34                                        fedora                                       1.4 M
 python3-idna                                               noarch                                      2.10-3.fc34                                         fedora                                        99 k
 python3-jinja2                                             noarch                                      2.11.3-1.fc34                                       fedora                                       493 k
 python3-jmespath                                           noarch                                      0.10.0-1.fc34                                       updates                                       46 k
 python3-markupsafe                                         x86_64                                      1.1.1-10.fc34                                       fedora                                        32 k
 python3-ntlm-auth                                          noarch                                      1.5.0-2.fc34                                        fedora                                        53 k
 python3-ply                                                noarch                                      3.11-11.fc34                                        fedora                                       103 k
 python3-pycparser                                          noarch                                      2.20-3.fc34                                         fedora                                       126 k
 python3-pynacl                                             x86_64                                      1.4.0-2.fc34                                        fedora                                       110 k
 python3-pysocks                                            noarch                                      1.7.1-8.fc34                                        fedora                                        35 k
 python3-pytz                                               noarch                                      2021.1-2.fc34                                       fedora                                        49 k
 python3-pyyaml                                             x86_64                                      5.4.1-2.fc34                                        fedora                                       194 k
 python3-requests                                           noarch                                      2.25.1-1.fc34                                       fedora                                       114 k
 python3-requests_ntlm                                      noarch                                      1.1.0-14.fc34                                       fedora                                        18 k
 python3-urllib3                                            noarch                                      1.25.10-4.fc34                                      fedora                                       175 k
 python3-xmltodict                                          noarch                                      0.12.0-11.fc34                                      fedora                                        23 k
 sshpass                                                    x86_64                                      1.09-1.fc34                                         fedora                                        27 k
Installing weak dependencies:
 python3-paramiko                                           noarch                                      2.7.2-4.fc34                                        fedora                                       287 k
 python3-pyasn1                                             noarch                                      0.4.8-4.fc34                                        fedora                                       133 k
 python3-winrm                                              noarch                                      0.4.1-2.fc34                                        fedora                                        79 k

Transaction Summary
===============================================================================================================================================================================================================
Install  26 Packages

Total download size: 25 M
Installed size: 143 M
Downloading Packages:

<<< Output Truncated >>>

Complete!
[ansible@fedora-server-34 ~]$
Excellent, feel the power yet? Let’s get a little crazy. Let’s write a playbook. Let’s install a package!
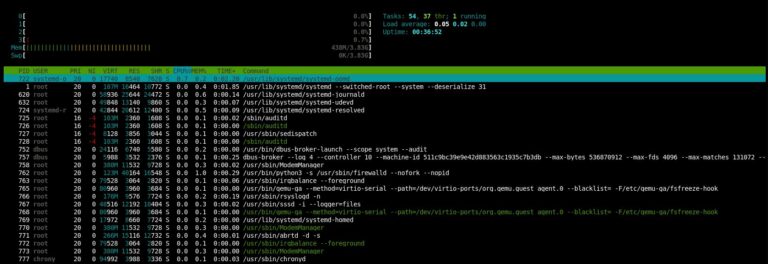
I really like htop. It is a “graphical” tool that, in this author’s opinion, makes it much easier to read and understand the output of the top command.
Luckily, it’s available from the default Fedora repos. So, using your favorite text editor, create htop.yml:
---
- name: installing packages
  hosts: localhost
  become: yes
  tasks:
    - name: install htop
      package:
        name: htop
        state: latest
What’s all this mean? Let’s break it down line by line. Make sure to start your playbook with three hyphens (-), then name tags are just that, it lets you know what task is being run to make it easier to understand the output (and especially troubleshoot any problems). Next, we have the hosts. For this super-simple example, we are only calling localhost. This could also call any number of hostnames or groups listed in an inventory file. Become is basically your sudo command. If you set Become to yes, Ansible will run with administrative privileges. Otherwise, the playbook will run as whatever user calls the playbook.
Under tasks, we have another name tag. We are calling the package module. This is what is so cool about Ansible; you can actually build playbooks that will run over differing distributions! The package module is intuitive enough to know what your system’s package manager is: apt for Ubuntu, yum for CentOS, dnf for Fedora, and so on. Next, we call the package, in our case, htop. The final line is the state of the package. We can set this to a specific version, to absent (if we don’t want the called package installed), or latest, which (you guessed it!) means the package will be on the latest version.
Now, save your config file, and let’s run our playbook:
[ansible@fedora-server-34 ~]$ rpm -qa|grep htop
[ansible@fedora-server-34 ~]$ ansible-playbook htop.yml
[WARNING]: provided hosts list is empty, only localhost is available. Note that the implicit localhost does not match 'all'

PLAY [installing packages] ************************************************************************************************************************************************************************************

TASK [Gathering Facts] ****************************************************************************************************************************************************************************************
ok: [localhost]

TASK [install htop] *******************************************************************************************************************************************************************************************
changed: [localhost]

PLAY RECAP ****************************************************************************************************************************************************************************************************
localhost                  : ok=2    changed=1    unreachable=0    failed=0    skipped=0    rescued=0    ignored=0

[ansible@fedora-server-34 ~]$ rpm -qa|grep htop
htop-3.0.5-4.fc34.x86_64
[ansible@fedora-server-34 ~]$
You can see htop is not installed before we run our playbook, then after we run it, htop is indeed present!
Wrap Up
So, there you have it. You now have the power to go out and install a package on any SSH-enabled host system. Go forth and blow people’s minds! When you take this simple example and zoom out, you start to see the sheer power that Ansible can bring to a Systems Administrator. Step aside, Luke Skywalker, we don’t need the Force anymore to move your X-Wing. We’ll do it with Ansible!
Okay…That may be over the top. However, I can’t overstate the truth: Build out your playbooks. Grow your Ansible skills. The rule is, if you have to do a task more than once: AUTOMATE IT! Stop installing packages by hand. Quit wasting your time bootstrapping servers by copy-pasting commands out of a shared document. Take those commands, add in some Jinja-variable goodness, and let computers do what they were meant to do: make the lives of humans easier.
Need some more ideas to get you going? No problem! Ansible has AH-MAZE-ZING documentation and an awesome Getting Started landing page.
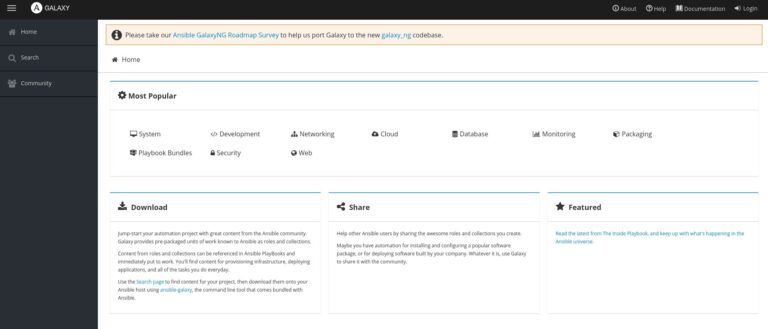
Like a terrible TV infomercial, just wait, there’s more! Have a favorite open source project you like or a system service that you tend to modify? You may not even have to start from scratch! Ansible has galaxies (pun intended) of pre-built roles and playbooks available. Ansible Galaxy is a community-driven effort to provide pre-built code to get your systems up and running fast. They have playbooks for Nextcloud Server, LAMP, and even desktop applications!
I use Ansible every time I build out a new VM. I use Ansible to ensure my user account is configured exactly the same way across all my systems: laptop, desktop, server, VMs, and cloud! Admittedly, my list of Ansible To-Dos is still fairly large, however, I try to spend a little time each month adding to it. Slowly but surely, I am automating and standardizing my home lab and home production systems. You can too!
Let me know below how you are or are planning to use Ansible.
Did you like this post? Let me know in the comments if there is more you’d like to read on this topic. There is SO much more we could talk about from products like Red Hat’s Ansible Tower (or the upstream AWX project) to large-scale use cases, bootstrapping, and more. So, by all means, let me know what you are interested in.
Thank you so much for spending your valuable time to hear my “war stories” and letting me share a tool with you I am quite passionate about.
(This post originally appeared here and is used with permission.)


